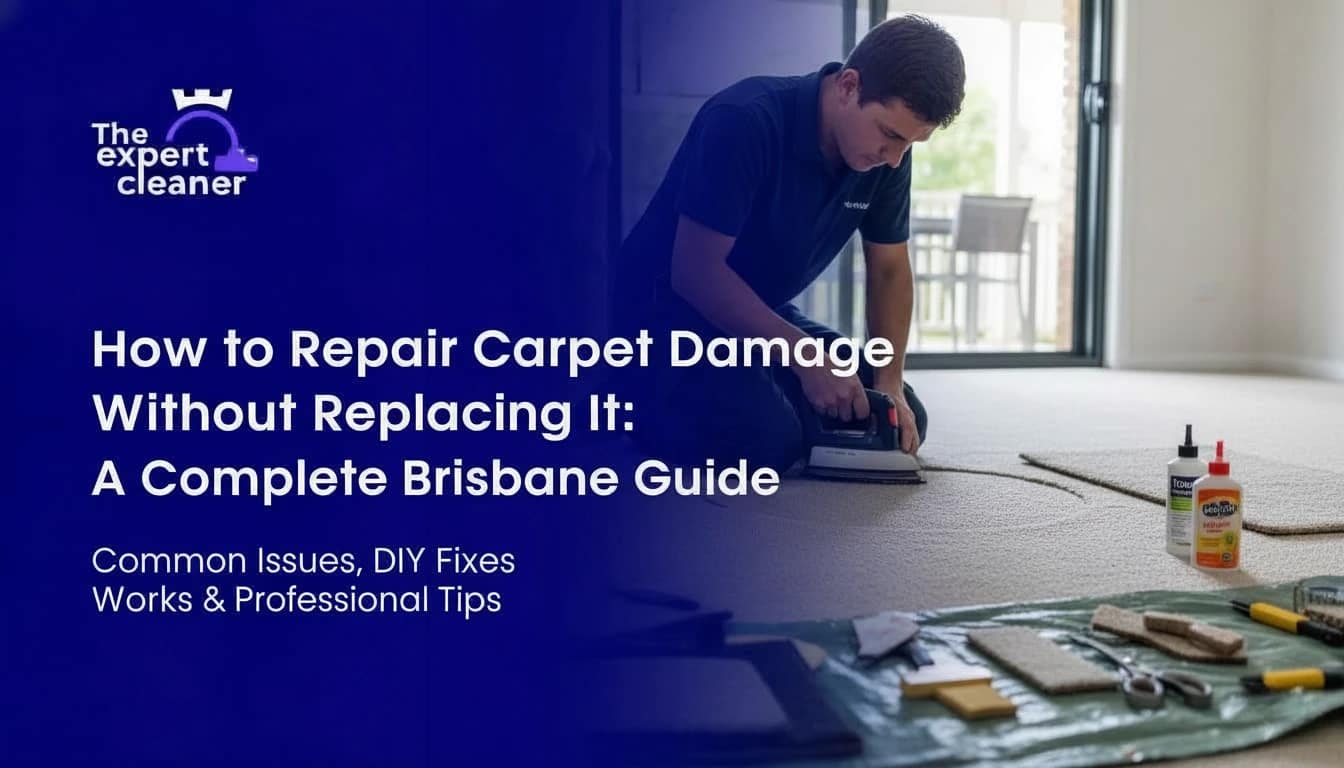
How to Repair Carpet Damage Without Replacing It: A Complete Brisbane Guide
Damaged carpet doesn’t always mean expensive replacement. Whether you’re dealing with unsightly burns, stubborn stains, pet damage, or frustrating wrinkles, professional carpet repair offers an affordable alternative that can save you hundreds—or even thousands—of dollars. In Brisbane’s competitive real estate and rental market, maintaining pristine carpets without the hefty price tag of replacement makes financial sense for homeowners and tenants alike.
This comprehensive guide explores proven carpet repair techniques that restore your flooring to near-perfect condition without the hassle, expense, and environmental impact of complete carpet replacement. From DIY-friendly fixes to professional solutions, you’ll learn exactly how to address common carpet damage and when to call in the experts.
Understanding Carpet Damage: Can It Be Repaired?
Not all carpet damage requires replacement. The key is understanding which types of damage are repairable and which situations call for new carpet. Generally, if your carpet is less than 10 years old, has isolated damage rather than widespread deterioration, and the underlying padding remains in good condition, repair is almost always the most cost-effective option.
Common Repairable Carpet Damage:
- Burns and heat marks (cigarettes, hair tools, hot pans)
- Holes and tears (furniture damage, pet claws, snags)
- Stains and bleach spots (permanent discoloration requiring dyeing)
- Frayed edges and seams (separation at carpet joins)
- Wrinkles and ripples (loosening from improper installation or humidity)
- Pet damage (scratches, pulls, isolated torn areas)
- Water damage (if addressed quickly before mould develops)
When Replacement Makes More Sense:
- Extensive damage covering large areas or multiple rooms
- Age-related deterioration (carpets older than 15 years with widespread wear)
- Severe mould contamination from prolonged water exposure
- Complete padding failure requiring full subfloor work
- Overwhelming odors that professional cleaning can’t resolve

Repair Method #1: Carpet Patching for Burns, Holes, and Tears
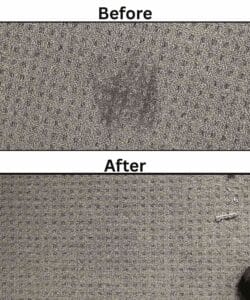
Side-by-side comparison showing carpet burn damage before and after repair.
Patching is the most common carpet repair technique, ideal for addressing localized damage like burns, holes, tears, and pet damage. Professional patching creates virtually invisible repairs when performed correctly, seamlessly blending the new section with surrounding carpet.
How Carpet Patching Works
The patching process involves:
- Cutting out the damaged section using a sharp utility knife, creating a clean square or circular shape around the damage
- Sourcing matching carpet from remnants saved during installation, hidden areas like closets, or spare carpet pieces
- Cutting a precise replacement patch slightly larger than the damaged area, ensuring fiber direction matches
- Preparing the area by applying double-sided carpet tape or carpet adhesive to the floor beneath
- Installing the patch by carefully placing it into position, aligning fiber direction and pattern
- Securing the repair by pressing firmly and placing weight (books or heavy objects) on the patch for 24 hours
- Blending the repair by trimming any uneven fibers and brushing the area to integrate the patch with surrounding carpet
Professional vs. DIY Patching
DIY patching is possible for small burns (under 2 inches) if you have matching carpet and basic tools. Costs run $20-$50 for materials including carpet tape, adhesive, utility knife, and seam roller.
Professional patching is recommended for:
- Larger damage areas (over 5 inches)
- Visible high-traffic locations where seamless blending is critical
- Patterned carpets requiring precise alignment
- Expensive designer carpets where mistakes would be costly
Special Considerations for Burns
Minor burns affecting only the tips of carpet fibers can sometimes be addressed without patching:
Trimming method: Use small scissors to carefully snip away charred fiber tips, then fluff the area to blend
Sandpaper method: For shallow burns, lightly sand the blackened area with fine-grit sandpaper to remove discoloration
Fiber transfer: For tiny burns, extract matching fibers from hidden areas (closet edge or under furniture) and glue them into the burnt spot using carpet adhesive
Deeper burns penetrating into the carpet backing require full patching.
Repair Method #2: Carpet Stretching to Remove Wrinkles and Ripples

Using a power stretcher to remove wrinkles and stretch carpet near the wall.
Carpet wrinkles, ripples, and buckling are extremely common problems caused by humidity, poor installation, heavy furniture movement, or simply aging carpet. These unsightly waves aren’t just cosmetic issues—they create tripping hazards, accelerate wear, and make professional cleaning less effective.
What Causes Carpet to Wrinkle?
Brisbane’s subtropical climate with high humidity causes carpet backing to expand and contract, loosening it from tack strips and creating visible ripples. Other causes include:
- Poor original installation without proper power stretching
- Heavy furniture dragged across carpet, pulling it loose
- Water damage or excessive moisture saturating padding
- Age-related loosening as carpet backing loses tension over time
How Professional Carpet Stretching Works
Carpet stretching uses specialized tools to re-tension loose carpet, eliminating wrinkles and securing it firmly back to tack strips:
Power Stretcher: For whole-room stretching, professionals use a power stretcher—a long lever tool that applies significant force to pull carpet tight. The stretcher’s tail block presses against one wall while the head grips the carpet and stretches it toward the opposite wall.
Knee Kicker: For smaller wrinkles or tight spaces, a knee kicker (a smaller hand-operated tool) stretches shorter distances. The padded end is “kicked” with the knee to move carpet incrementally toward walls.
The Stretching Process:
- Furniture removal from the affected room
- Lifting carpet from tack strips along one wall
- Setting up the power stretcher with the tail block against the opposite wall
- Stretching the carpet systematically across the room, working from the center outward
- Re-securing to tack strips while carpet is under tension
- Trimming excess carpet along walls for a clean finish
- Repeating for each direction until all wrinkles are eliminated
DIY Stretching Considerations
While power stretchers and knee kickers can be rented for $50-$150, DIY stretching is challenging without experience. Improper stretching can:
- Tear carpet backing if over-stretched
- Create new wrinkles in different locations
- Fail to properly secure carpet to tack strips
- Damage seams or cause splitting
For valuable carpets or whole-room issues, professional stretching is recommended.
Repair Method #3: Seam Repair for Split or Fraying Carpet Joins
Carpet seams—where two pieces of carpet meet—can split apart, peak (rise above the surface), or fray over time, particularly in high-traffic areas. Visible seams are not only unsightly but also accelerate further damage as edges unravel.
Why Carpet Seams Fail
Seam problems develop due to:
- Poor original installation with inadequate adhesive or improper seaming technique
- Heavy foot traffic constantly stressing the seam join
- Low-quality padding that doesn’t provide firm support beneath seams
- Moisture weakening adhesive bonds over time
- Age as original adhesive degrades
Professional Seam Repair Methods
Split Seam Repair:
For seams that have pulled apart, professionals:
- Measure the split to determine required materials
- Pull back both carpet edges to expose the subfloor
- Clean the area removing old adhesive, dirt, and debris
- Apply new seaming tape (heat-activated or peel-and-stick) centered under the seam
- Heat the tape using a seaming iron to activate adhesive
- Press carpet edges together firmly onto the hot tape
- Weight the seam with heavy objects for several hours while adhesive cures
- Blend the seam by trimming stray fibers and brushing to integrate
Seam Sealing:
For minor fraying or to prevent splitting, professionals apply seam sealer (liquid adhesive) along carpet edges, creating a protective barrier that holds fibers in place and prevents unraveling.
Repair Method #4: Carpet Dyeing for Bleach Spots and Permanent Stains

Bleach spots, chemical stains, and sun-faded areas present unique challenges because these aren’t traditional “stains” that cleaning can remove—they represent permanent color loss from carpet fibers. Professional carpet dyeing offers a cost-effective solution that restores color without requiring patching or replacement.
Understanding Bleach Damage
When bleach contacts carpet, it chemically strips dye molecules from fibers, creating permanent discoloration ranging from yellow to white depending on the original carpet color. Standard cleaning cannot reverse this chemical process—new dye must be introduced to restore color.
Professional Carpet Dyeing Process
Expert carpet dyeing is a specialized skill requiring chemistry knowledge and precise color matching:
Step 1: Neutralization
Bleach raises carpet pH to highly alkaline levels. Before dyeing, professionals must neutralize the bleach using hydrogen peroxide or sodium thiosulfate, bringing pH back to neutral. Without neutralization, carpet won’t accept dye properly.
Step 2: Color Analysis
Rather than guessing, professionals scientifically analyze which specific dye components (red, yellow, or blue) are missing from the bleached area. Most bleach spots lose partial color rather than complete color, requiring custom dye blends.
Step 3: Custom Dye Mixing
Using permanent carpet mill dyes, professionals mix precise color formulas matching the original carpet shade. This requires extensive color theory knowledge and experience.
Step 4: Heat-Activated Application
Dye is applied at 165°F or hotter using specialized applicators, often hand-applying dye fiber by fiber for precision. The high heat ensures deep penetration and permanent bonding.
Step 5: Setting and Finishing
After dye application, the area is heat-set to lock in color permanently. Properly dyed carpet resists fading even after professional cleaning and heavy traffic.
Important Limitations:
- Solution-dyed carpets (polypropylene/olefin) are extremely difficult to dye as color is integrated during fiber manufacturing
- Dark stains on light carpet are challenging—dyeing works best when adding color to bleached areas rather than covering dark stains
- Aged or worn carpets may have inconsistent dye absorption, creating uneven results
Repair Method #5: Pet Damage Restoration

Side-by-side comparison of carpet showing pet damage before repair and restored appearance after repair.
Pet damage—from scratching, chewing, urine staining, and digging—is among the most common reasons homeowners consider carpet replacement. However, most pet damage is repairable at a fraction of replacement cost.
Types of Pet Carpet Damage
Pulled Fibers and Snags:
When pet claws catch in carpet loops, they pull fibers loose, creating frizzy loops and unsightly snags. Fix by:
- Trimming loose threads carefully with sharp scissors
- Brushing the area to blend remaining fibers
- Applying small amounts of carpet glue if fibers are lifted
Torn or Chewed Edges:
Pets often chew corners, doorways, and carpet edges. Repair involves:
- Cutting away the damaged section cleanly
- Applying carpet adhesive beneath
- Pressing down and weighting until dry
- Alternatively, patching larger tears using the method described earlier
Flattened or Matted Carpet:
Areas where pets repeatedly lie down become flattened and matted. Restore by:
- Spraying warm water on the flattened area
- Using a spoon or stiff brush to lift fibers
- Placing a damp towel over the area and applying gentle steam with an iron
- Allowing carpet to dry while fibers remain fluffed
Urine Stains and Odors:
Pet urine creates both visible staining and persistent odors:
- Blot immediately with clean cloths to absorb moisture
- Apply vinegar solution (equal parts white vinegar and warm water) to neutralize odor and lighten stains
- Sprinkle baking soda after drying to absorb remaining odors
- Professional enzyme treatments for severe or old urine damage where odors have penetrated padding
When to DIY vs. Hire Professionals
Understanding your skill level and the complexity of damage helps you make the right repair choice.
Good DIY Candidates:
- Minor burns under 1 inch requiring only trimming
- Small pulled fibers from pet snags
- Fresh pet urine stains caught immediately
- Tiny holes (under 1 inches) if you have matching carpet scraps
- Minor wrinkles in low-traffic areas where appearance isn’t critical
Hire Professionals For:
- Large or visible damage in main living areas
- Patterned carpets requiring precise alignment
- Whole-room carpet stretching requiring power stretchers
- Seam repairs affecting structural integrity
- Bleach spots requiring professional dyeing
- Water damage with mould concerns
- Expensive designer carpets where mistakes would be costly
Repair Timeline: How Long Does Carpet Repair Take?
Small Patch Repair: 2-3 hours including drying time
Carpet Stretching (one room): 1-3 hours
Seam Repair: 1-2 hours
Bleach Spot Dyeing: 2-4 hours including application and setting time
Multiple Repairs: 4-6 hours for several repairs in one visit
Water Damage Restoration: 2-7 days depending on severity, including drying time
Compare this to carpet replacement timelines:
- Single room replacement: 4-6 hours installation + 1-2 days for delivery and preparation
- Full home replacement: 1-3 days
Repair allows you to address damage immediately without waiting for new carpet delivery or extensive installation.
Preventing Future Carpet Damage
Once your carpet is repaired, protect your investment with preventive maintenance:
For Burn Prevention:
- Use heat-resistant mats under hair styling tools and irons
- Keep candles and hot items away from carpet edges
- Designate hardwood or tile areas for activities involving heat sources
For Pet Damage Prevention:
- Trim pet nails regularly to reduce snagging and scratching
- Place scratching posts and pads in strategic locations
- Address pet anxiety or behavioral issues causing destructive behavior
- Clean accidents immediately to prevent deep penetration into padding
For Wrinkle Prevention:
- Use furniture sliders when moving heavy items
- Ensure proper humidity control (40-60% relative humidity) in Brisbane’s climate
- Address water leaks immediately before moisture loosens carpet
- Have carpets professionally stretched during installation to prevent future rippling
General Carpet Maintenance:
- Vacuum weekly with proper settings for your carpet type
- Have carpets professionally cleaned every 6-12 months
- Address spills and stains immediately before they set
- Use entry mats to reduce dirt and debris tracked onto carpet
- Rotate furniture periodically to distribute wear patterns
The Expert Carpet Cleaner: Brisbane’s Carpet Repair Specialists
When your carpet suffers damage, The Expert Carpet Cleaner offers comprehensive repair services that restore your flooring without the expense of replacement. Our experienced technicians specialize in patching, stretching, seam repair, and professional cleaning that addresses both visible and hidden damage.
Beyond carpet repair, we offer expert carpet cleaning, flood damage restoration, couch cleaning, mattress cleaning, and rug cleaning throughout all Brisbane suburbs.
For a free assessment of your carpet damage and a no-obligation repair quote, contact us through our booking form or explore our complete carpet services.
Don’t let damaged carpet drain your budget—professional repair can save you thousands while restoring your flooring to like-new condition.
Frequently Asked Questions
Can all types of carpet be repaired?
Most residential carpets—including nylon, polyester, wool, and blends—can be successfully repaired. Loop pile carpets (Berber) require special techniques to prevent unraveling. Solution-dyed polypropylene carpets cannot be easily dyed but can still be patched, stretched, or have seams repaired.
How long do carpet repairs last?
Professional repairs, when performed correctly, last as long as the surrounding carpet—typically 5-10+ years. Patched areas may actually be more durable than original carpet since new padding and adhesive are used.
Will repaired areas be noticeable?
Professional repairs are designed to be virtually invisible. Success depends on having matching carpet (for patches), precise fiber alignment, and skilled technique. Brisbane’s expert carpet repair companies guarantee invisible repairs or they’ll re-do the work.
Can I use carpet from a closet to patch visible damage?
Yes, this is a common strategy. Professionals cut matching carpet from closets, under beds, or other hidden areas to patch visible damage in main living spaces. The closet area can then receive a less-perfect patch since it’s rarely seen.
Is professional carpet cleaning necessary after repair?
Yes, professional cleaning after repairs helps blend repaired areas with surrounding carpet by refreshing fiber appearance and removing embedded dirt that makes damage more visible. The Expert Carpet Cleaner offers comprehensive cleaning services following repair work.